This is the 5th in a series of 13 articles on Deep Pressure Massage Technique for the Low Back
Positioning the Feet
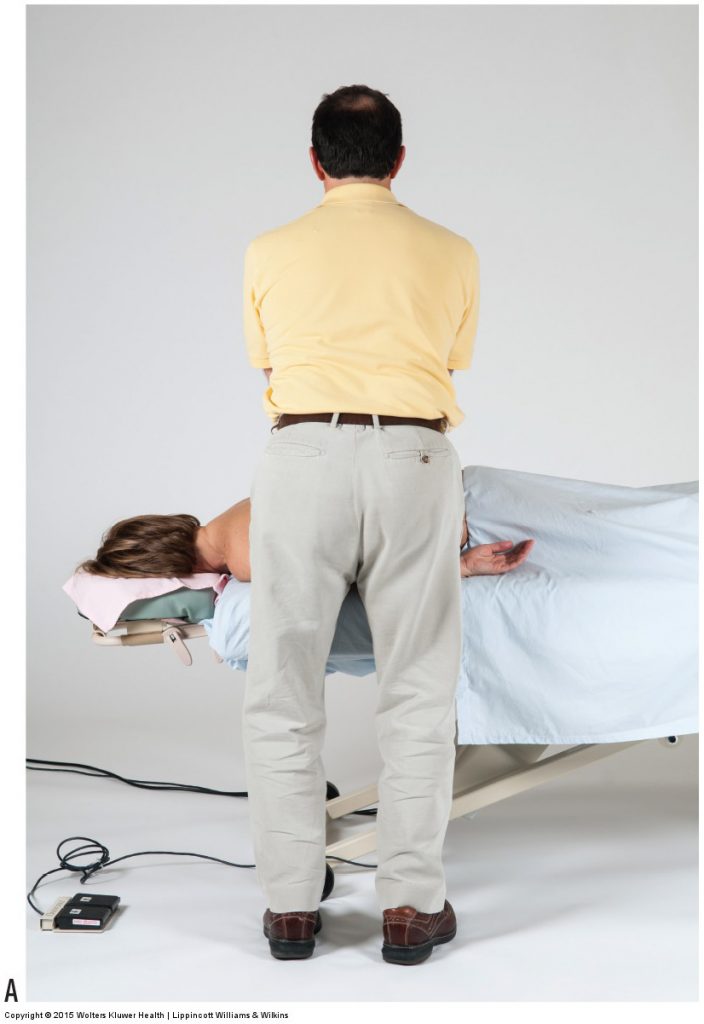
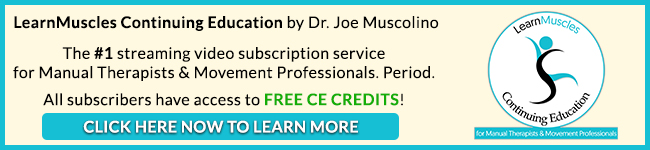
Figure 7. Positioning the feet. (A) When working across the client’s body, the feet should be pointed across the client’s body. (B) When working longitudinally up the client’s body, the feet should be in a sagittal plane stance, pointed up the client’s body. Note that the stance is not too wide, and the rear foot is oriented in the sagittal plane. (C) The rear foot should not be oriented perpendicular to the front foot. Permission Joseph E. Muscolino. Manual Therapy for the Low Back and Pelvis – A Clinical Orthopedic Approach (2013).
Positioning the feet is extremely important because it determines where the core of the body is oriented. If the stroke is being done across the client’s back or pelvis, then the positioning the feet should be oriented transversely across the table (Fig. 7A). If the stroke is being done up along the client’s pelvis and back, then positioning the feet should be oriented longitudinally up along the length of the table (Fig. 7B). In effect, the feet should point in the direction of the stroke that is being performed.
It is also important to place the feet in a sagittal plane stance, with one foot forward and the other foot in back (as seen in Fig. 7B). This provides a stable base when working and also allows for a transfer of weight from the rear foot to the front foot in the sagittal plane if a stroke is being performed. Also, make sure that the feet are not too far apart. A wide stance may feel more stable but creates a static position that makes it difficult to transfer weight from one foot to the other. With a narrower stance, it is easier to shift the center of weight of the body from one foot to the other as a stroke is done. Further, it is better to orient the foot in back approximately parallel with the front foot so that the powerful sagittal plane musculature of the rear lower extremity is in line with the stroke and can be used to add to the force of the stroke. Placing the rear foot transversely is a common error and should be avoided because it does not orient the sagittal plane musculature in line with the stroke (Fig. 7C). Further, it can result in a genu valgus force to the knee.
Figure 7B. Permission Joseph E. Muscolino. Manual Therapy for the Low Back and Pelvis – A Clinical Orthopedic Approach (2013).
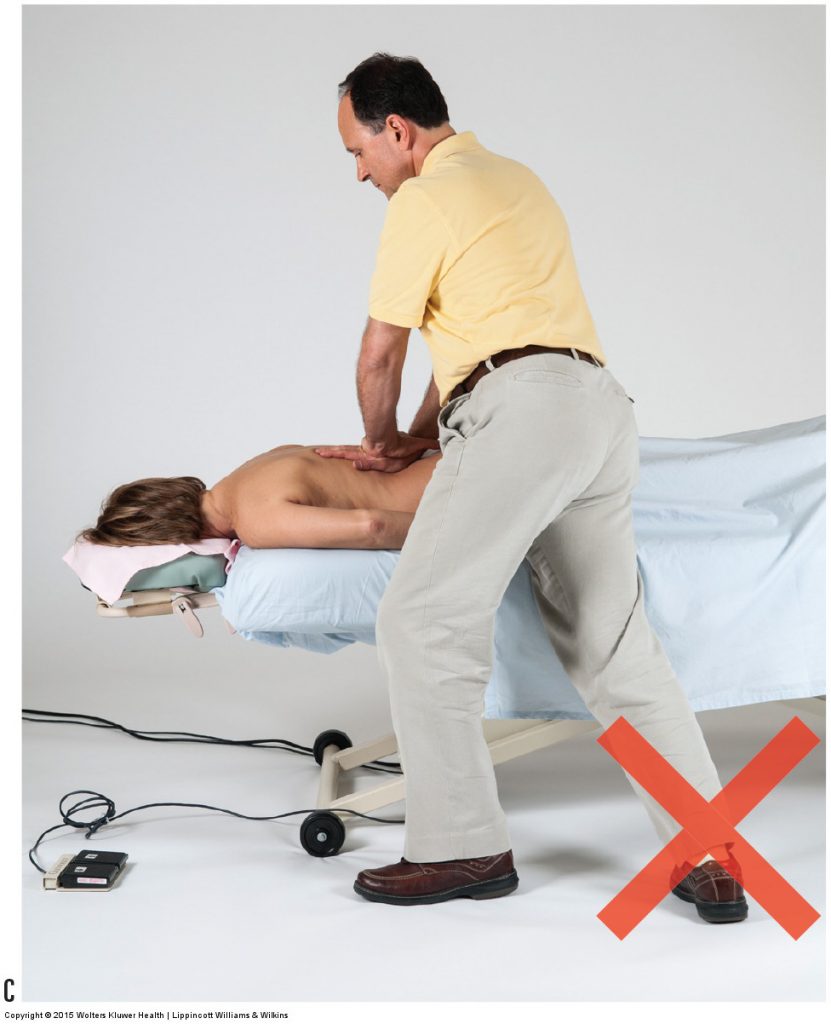
Figure 7C. Permission Joseph E. Muscolino. Manual Therapy for the Low Back and Pelvis – A Clinical Orthopedic Approach (2013).
Working Up the Back – Positioning the Feet
When working up the client’s back from inferior to superior, it is important to orient the core of the body so that it is in line with the stroke, in other words, facing the head end of the table. It is also important to position the trunk as close to being over the client’s body as possible. This can be especially challenging if the table is wide. Without climbing on the table, there are two ways to facilitate this. Following are two ways for positioning the feet for working up the back.
Positioning the Feet – Outer Foot in Back
Figure 8. Positioning the feet to place the core over the client. (A) Begin with both feet parallel to the table. (B) By placing the “outer foot” behind the “inner foot,” the core naturally positions over the table. (C) Alternately, the core can be positioned over the table by placing the “outer foot” in front of the “inner foot” and then adducting the thigh of the inner foot by moving the foot away from the table. Permission Joseph E. Muscolino. Manual Therapy for the Low Back and Pelvis – A Clinical Orthopedic Approach (2013).
One way for positioning the feet is to begin by standing next to the table, facing the head end (Fig. 8A). Now take the outer foot (the one that is farther from the table) and place it behind the inner foot (the one that is closer to the table). This will naturally lean the thighs against the table and place the pelvis over the table so that your trunk is closer to the middle of the table and facing the head of the table in line with your stroke (Fig. 8B). If any adjustment of the orientation of the core of your body is necessary, this adjustment should be done by rotating the pelvis at the hip joints and not by rotating the spinal joints. Note: To prevent genu valgum of the knee joint in front, the position of the front foot should be moved farther from the table until the knee posture is healthy.

Figure 8B. Permission Joseph E. Muscolino. Manual Therapy for the Low Back and Pelvis – A Clinical Orthopedic Approach (2013).
Positioning the Feet – Outer Foot in Front
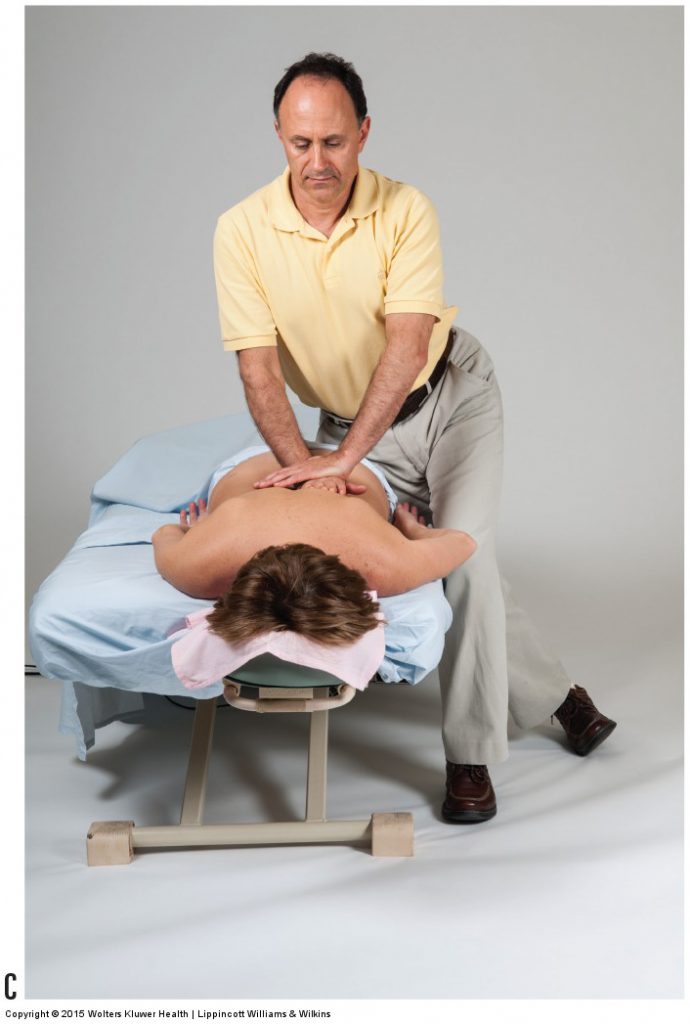
Figure 8C. Permission Joseph E. Muscolino. Manual Therapy for the Low Back and Pelvis – A Clinical Orthopedic Approach (2013).
The other way for positioning the feet is to begin by again standing next to the table, facing the head end (see Fig. 8A). This time, place the outer foot in front of the inner foot (Fig. 8C). Now adduct the thigh of the inner foot by moving your inner foot away from the table, allowing your thigh to rest against the side of the table (be sure that there are no hard or sharp projections where you are leaning against the side of the table; if the table is hard against the lateral thigh, a cushion can be placed between your thigh and the table). This will place your trunk over the table, oriented toward the head of the table, in line with your stroke. As with the previous method just described, if any adjustment of the orientation of the trunk is necessary, this adjustment should be done by rotating the pelvis at the hip joints and not by rotating the spinal joints.
This is the 5th of 13 articles on Deep Pressure Massage for the Low Back.
The thirteen articles are:
- Introduction to Deep Pressure Massage to the Low Back
- Deep Pressure Massage to the Low Back – Choosing the Right Table
- Deep Pressure Massage to the Low Back – Overview
- Deep Pressure Massage to the Low Back – Client and Therapist Positioning
- Deep Pressure Massage to the Low Back – Positioning the Feet
- Deep Pressure Massage to the Low Back – Choosing the Treatment Contact
- Deep Pressure Massage to the Low Back – Support Your Treatment Contact
- Deep Pressure Massage to the Low Back – Use Stacked Joints
- Deep Pressure Massage to the Low Back – Apply Pressure Perpendicularly
- Deep Pressure Massage to the Low Back – Use Body Weight
- Deep Pressure Massage to the Low Back – Tissue Tension Barrier
- Deep Pressure Massage to the Low Back – Deep Strokes
- Deep Pressure Massage to the Low Back – Forward Head Posture