Note: This is the sixth blog post article in a series of 14 articles on Assessment/Diagnosis of musculoskeletal conditions of the neck (cervical spine). See below for the other articles in this series.
Perhaps no assessment procedure is more important to the manual therapist and integral to musculoskeletal (myofascioskeletal) assessment than palpation.
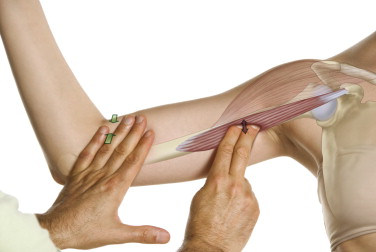
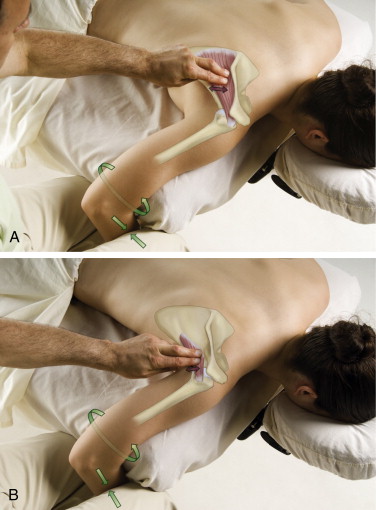
Palpation involves the physical assessment of the client’s bony and soft tissues through touch, usually with the pads of the fingers.
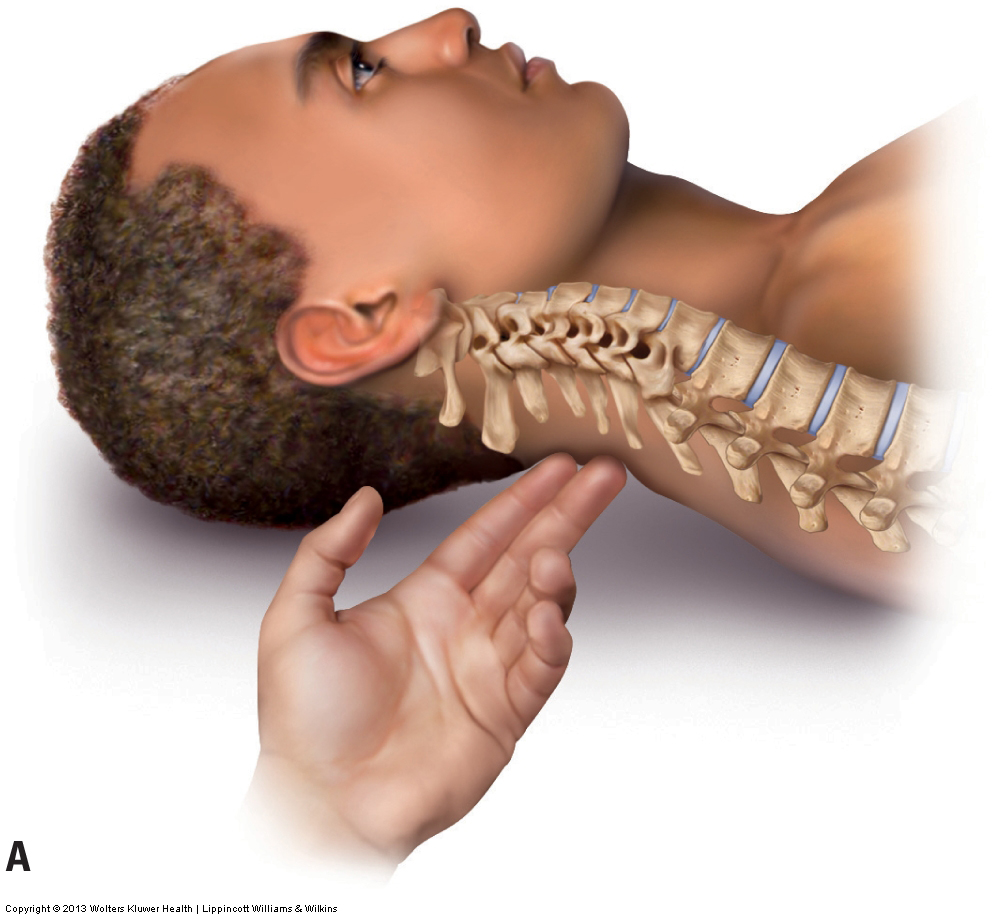

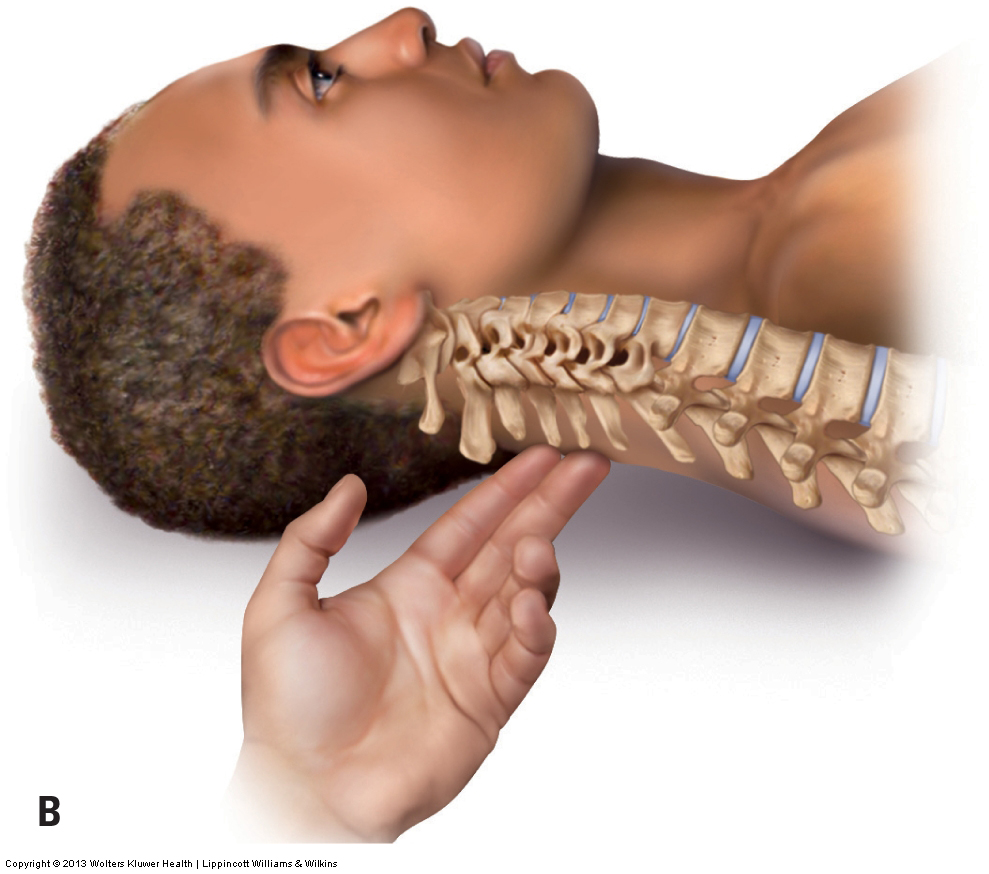
Palpation of bony landmarks can be important for determining the underlying skeletal structure that could otherwise be seen only on radiographic imaging. In the neck, it is important to feel for the spinous processes in order to assess the degree of the client’s cervical lordotic curve. Through chronic postures and physical traumas, the normal lordotic curve is often decreased, lost, or even at times reversed. The spinous processes of C2 and C7 are easily palpated with the client in the supine position. However, when the normal cervical curve is present, it is often difficult to feel the spinous processes of C3 through C6 (Fig. 4A). If the spinous processes of C3 through C6 can be easily felt, this indicates a decreased cervical curve (Fig. 4B).
Figure 4. Supine palpation of the spinous processes of the neck. (A) The spinous processes of C3 through C6 are challenging to palpate because of the normal lordotic curve of the neck. (B) All cervical spinous processes are easily palpable because the client’s neck curve is decreased (hypolordotic). Courtesy Joseph E. Muscolino.
(Note: Additional figures in this blog post article are courtesy of Joseph E. Muscolino.The Muscle and Bone Palpation Manual, with Trigger Points, Referral Patterns, and Stretching, 2ed. Elsevier. 2016.)
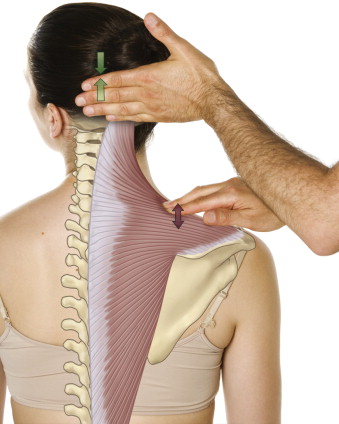
After assessing the curve of the cervical spine, soft tissue palpation can be performed.
FOLLOWING IS A LIST OF MUSCLE PALPATION GUIDELINES:
(Courtesy Joseph E. Muscolino, excerpted from The Muscle and Bone Palpation Manual, with Trigger Points, Referral Patterns, and Stretching, 2ed. Elsevier. 2016).
It should be emphasized that there is a science and an art to muscle (myofascial) palpation. We should not memorize a muscle palpation protocol for each of the muscles of the body, rather we should critically think and understand “how” to palpate and apply that understanding to the palpation assessment being done at that moment.
These guidelines provide a sense of the principles involved in successful muscle palpation.
- Know the attachments of the target muscle so that you know where to place your hands.
- Know the actions of the target muscle. The client will most likely be asked to perform one of them to contract the target muscle so that it can be discerned from the adjacent musculature. (Make sure that the client is not asked to hold the contraction too long or the target muscle may fatigue and the client may become uncomfortable.)
- Think critically to choose exactly which joint action of the target muscle best isolates its contraction.
- If necessary, add resistance to the client’s contraction of the target muscle. (When resistance is added, do not cross any joints that do not need to be crossed; in other words, be sure to resist only the action of the target muscle that is desired.)
- Look before placing your palpating hand on the client. (This is especially important with superficial muscles.)
- First find and palpate the target muscle in the easiest place possible.
- Strum perpendicularly across the belly or tendon of the target muscle.
- Once located, follow the course of the target muscle in small successive baby steps.
- At each baby step of palpation, have the client alternately contract and relax the target muscle, and feel for this tissue texture change as the muscle goes from relaxed and soft, to contracted and hard, to relaxed and soft again.
- Use knowledge of coupled actions to palpate target muscles that are scapular rotators.
- To aid palpation of the target muscle, use reciprocal inhibition of another muscle when needed. (When reciprocal inhibition is used, do not have the client contract the target muscle too forcefully, or the other muscle that is being reciprocally inhibited may be recruited anyway.)
- Use appropriate pressure. Appropriate pressure is neither too heavy nor too light.
- When using deep palpation pressure, sink slowly into the client’s tissues as the client breathes slowly and evenly.
- Once the palpation of one muscle is known, it can be used as a landmark to locate other muscles.
- Relax and passively slacken the target muscle when palpating it at its bony attachment.
- Close your eyes when you palpate to focus your attention on your palpating fingers.
- Construct a mental picture of the client’s anatomy under the skin as you palpate.
- If the client is ticklish, use firm pressure and have the client place a hand over your palpating hand.
- Fingernails need to be very short and smooth.
- Place the client in a position that is optimal for the muscle palpation.
Once a soft tissue has been located, the quality of the tissue is assessed. If the tissue being assessed is a muscle, the qualities to look for are whether it is hard or soft. Tight (overly contracted, locked short – locked long) muscles feel hard; loose, relaxed muscles are soft. If the muscle is hard, is the entire muscle hard? Or are there perhaps small knots of tightness or taut bands within the muscle? Small knots may be myofascial trigger points (TrPs), whereas taut bands are usually a result of bundles of muscle fibers that are either overly contracted and bunched up, or overly stretched and pulled taut. Taut bands are usually strummable, similar to twanging a guitar string.
Whether muscle tissue, other soft tissues, or bone is being assessed, palpation can provide a great deal of useful information. Palpating for swelling and increased temperature may reveal tissue inflammation; palpating for thickness and increased density within a soft tissue may reveal the buildup of fibrous adhesions within the tissues. It is also important to palpate the end-feel of a joint’s ROM. The end-feel of the neck’s joint motion occurs at the end of passive ROM and should have a small, healthy bounce to it (see Motion Palpation blog post for more on this assessment skill).
- The health history and range of motion (ROM) physical examination, which are usually done before palpation, often give the therapist some advance guidance about where to focus attention when palpating.
- Palpation often serves to confirm or eliminate the clinical impression that the therapist began to form during the earlier phases of the assessment procedures.
This blog post article is the sixth in a series of 14 blog post articles on Assessment/Diagnosis of musculoskeletal (neuro-myo-fascio-skeletal) conditions of the neck (cervical spine).
The articles in this series are:
- Introduction to Assessment/Diagnosis of the Neck
- Verbal and Written Health History
- Overview of Physical Examination Assessment
- Postural Assessment
- Neck General Orthopedic Assessment: Range of Motion and Manual Resistance
- Palpation Assessment
- Motion Palpation (Joint Play) Assessment
- Special Orthopedic Assessment Tests for the Neck – Space Occupying Conditions
- Special Orthopedic Assessment Tests – Space Occupying Conditions – Slump Test
- Orthopedic Assessment of Thoracic Outlet Syndrome – Adson’s, Eden’s, Wright’s
- Orthopedic Assessment of Thoracic Outlet Syndrome – Brachial Plexus Tension Test
- Special Orthopedic Assessment Tests – Vertebral Artery Competency Test
- Treatment Strategy and Treatment Techniques
- Assessment and Treatment of Specific Musculoskeletal Conditions