This is the 4th in a series of 13 articles on Deep Pressure Massage Technique for the Low Back
Body Mechanics for Positioning the Client
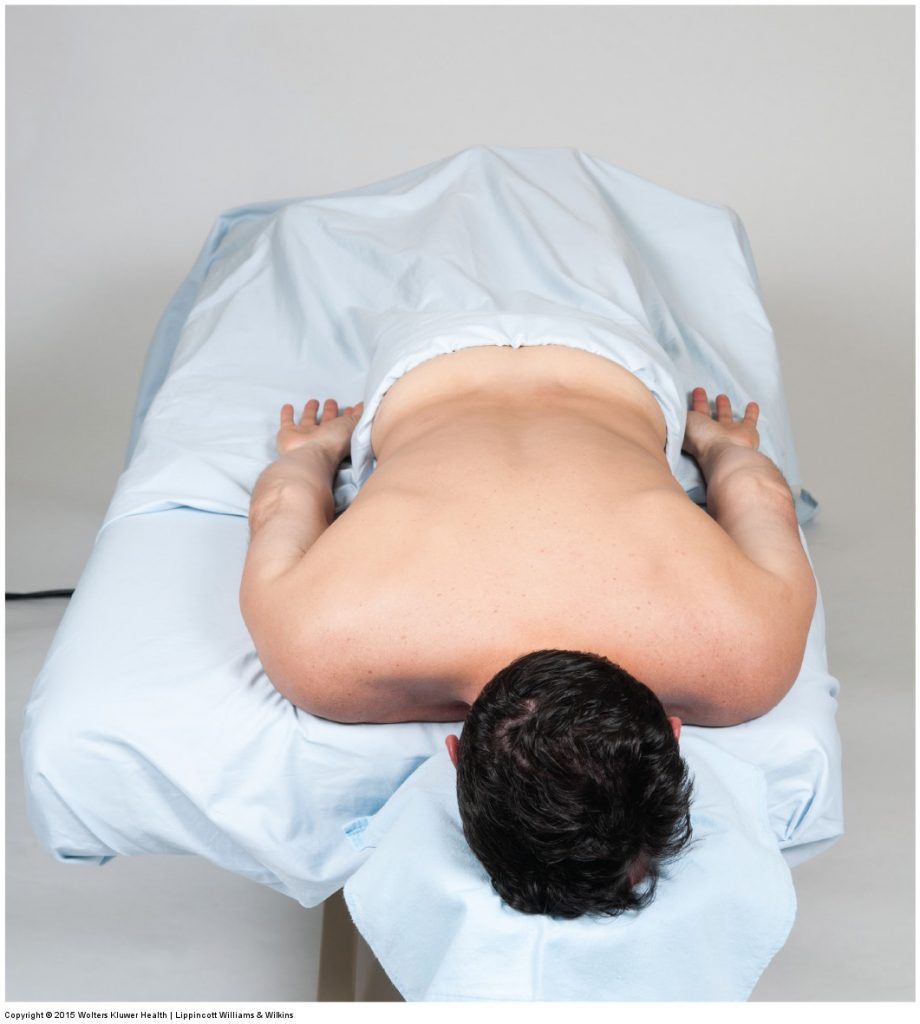
Figure 5. If the table allows for the prone client to lie close to the side of the table, it allows for the therapist to more easily position body weight over the client. Permission Joseph E. Muscolino. Manual Therapy for the Low Back and Pelvis – A Clinical Orthopedic Approach (2013).
For optimal body mechanics, generating deep pressure with body weight works best when you are directly over the client. This is facilitated by having the client as close to the edge of the table as possible. When working with the client supine, it is easy to ask the client to lie toward one side of the table or the other. But when the client is prone, because of the location of the face cradle, the client usually has to lie at the center of the table. If your table allows for the placement of the face cradle to be changed to be more to the side of the table, then it is helpful to position the client closer to the side so that it is easier to lean over and use your body weight (Fig. 5).
Adjusting Where You Stand
When working the back with the client prone, for optimal body mechanics, it is important for the therapist to stand as close as possible to the region of the client that is being worked. This allows the therapist to better position the trunk/core of the body over the client, allowing for optimal use of body weight. When working the pelvis or lumbar region, the therapist should stand directly to the side of the pelvis or lumbar spine of the client (Fig. 6A). If the lower thoracic region is worked, then the therapist should adjust the standing position to be at the side of the table next to the lower thoracic spine of the client (Fig. 6B). To work the upper and middle thoracic region, you need to choose which side of the client you want to work and stand on that side of the table, between the face cradle and the top of the table. This allows you to place your core directly over the client’s upper thoracic region on that side of the body (Fig. 6C). A common body mechanics error is for the therapist to stand above the face cradle at the head end of the table. Standing here only distances you from the client, causing you to lean over the client to reach the low back; this compromises body mechanics and does not allow for the efficient use of body weight (Fig. 6D). Optimally positioning your core requires you to optimally position where you stand.
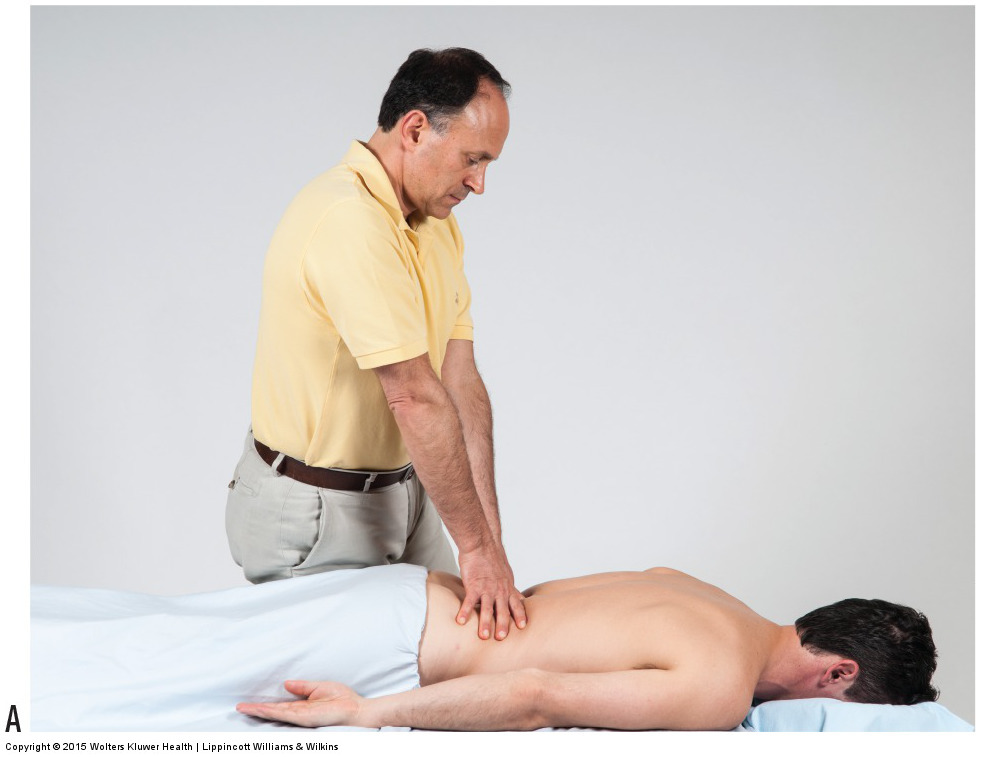
Figure 6. Adjust where you stand. When working the lumbosacral region (A) or the lower thoracic region (B), the therapist stands at the side of the table, adjacent to the region being worked. When working the upper and middle thoracic region, the therapist stands at the head of the table, between the face cradle and the top of the table (C). Standing above the face cradle leads to poor body mechanics (D). Permission Joseph E. Muscolino. Manual Therapy for the Low Back and Pelvis – A Clinical Orthopedic Approach (2013).
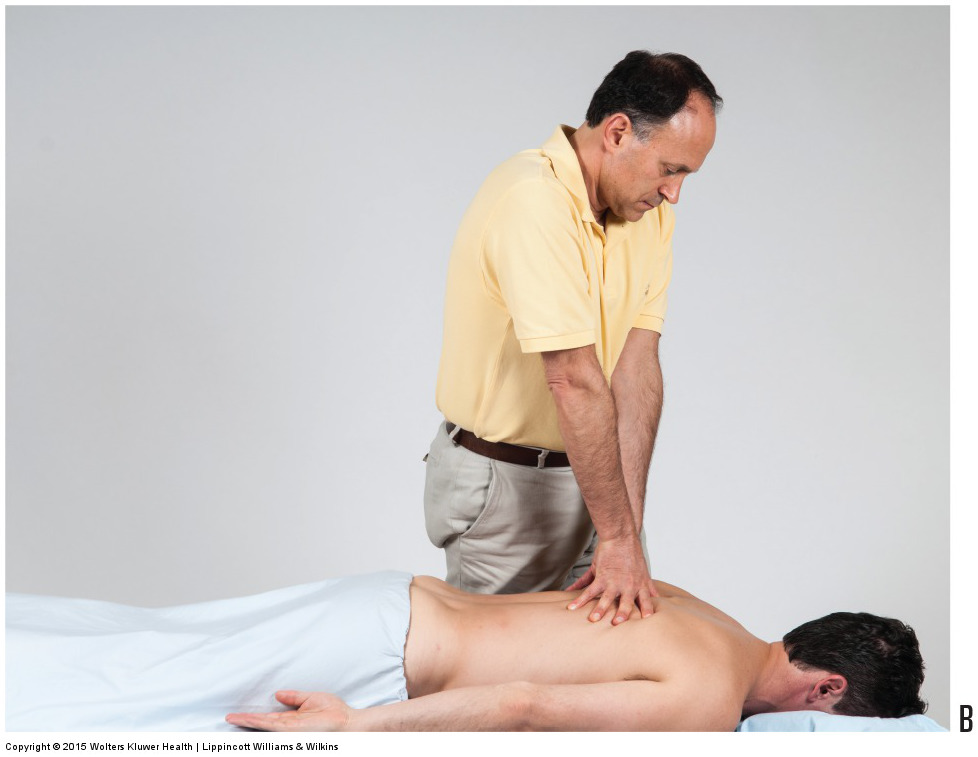
Figure 6B. Permission Joseph E. Muscolino. Manual Therapy for the Low Back and Pelvis – A Clinical Orthopedic Approach (2013).
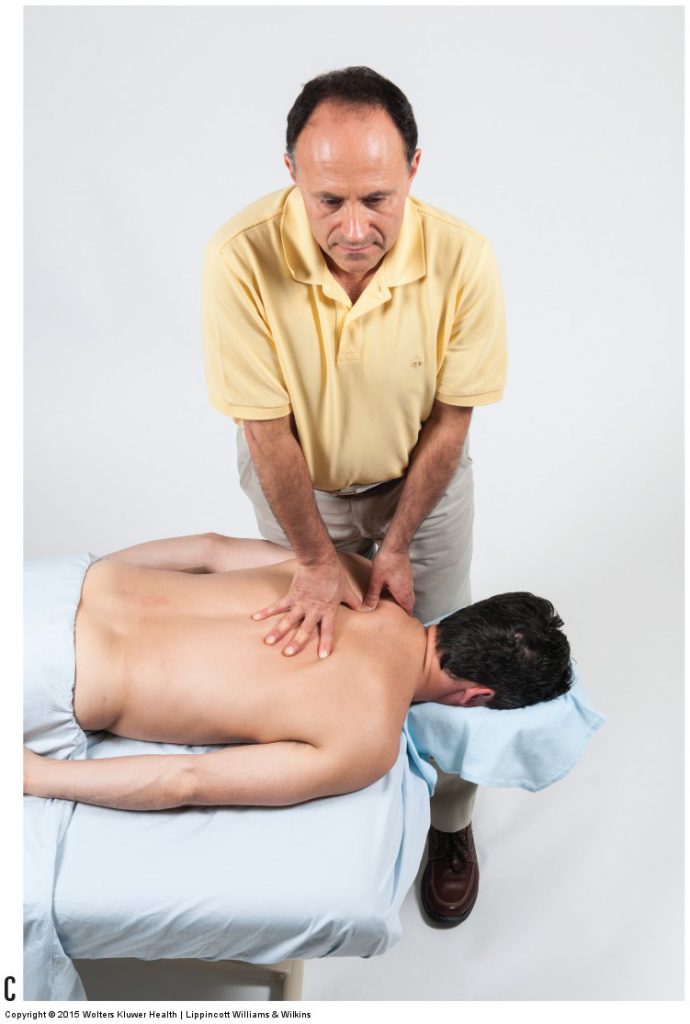
Figure 6C. Permission Joseph E. Muscolino. Manual Therapy for the Low Back and Pelvis – A Clinical Orthopedic Approach (2013).
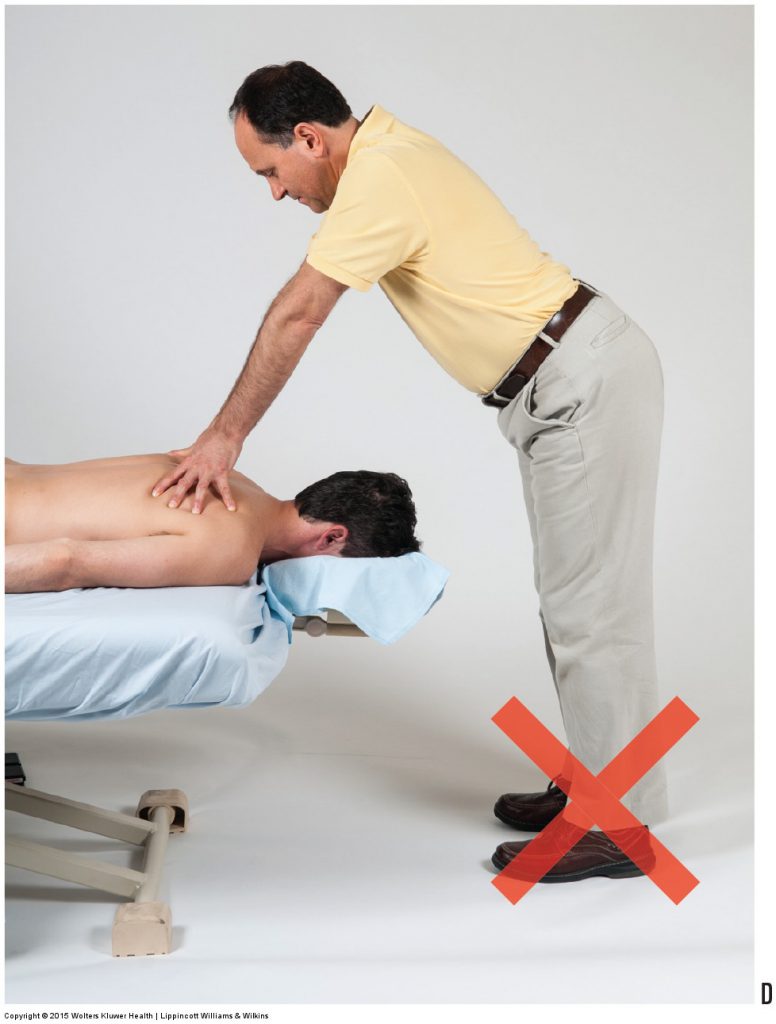
Figure 6D. Permission Joseph E. Muscolino. Manual Therapy for the Low Back and Pelvis – A Clinical Orthopedic Approach (2013).
Use the Corner of the Table
When working the thoracic spine, for optimal body mechanics it can be advantageous to work from superior to inferior (instead of inferior to superior) because the therapist can position himself closer to the client’s trunk by standing at the head end of the table.
As previously stated, when working from the head of the table, it is unwise to stand above the face cradle because this distances the therapist from the client, making it more difficult to employ efficient body mechanics (see Fig. 6D). It is better to choose which side you want to work and then straddle the corner on that side at the head end of the table. This allows you to stand much closer to the client, facilitating positioning the core over the client for more efficient use of body weight.
This is the 4th of 13 articles on Deep Pressure Massage for the Low Back.
The thirteen articles are:
- Introduction to Deep Pressure Massage to the Low Back
- Deep Pressure Massage to the Low Back – Choosing the Right Table
- Deep Pressure Massage to the Low Back – Overview
- Deep Pressure Massage to the Low Back – Client and Therapist Positioning
- Deep Pressure Massage to the Low Back – Positioning the Feet
- Deep Pressure Massage to the Low Back – Choosing the Treatment Contact
- Deep Pressure Massage to the Low Back – Support Your Treatment Contact
- Deep Pressure Massage to the Low Back – Use Stacked Joints
- Deep Pressure Massage to the Low Back – Apply Pressure Perpendicularly
- Deep Pressure Massage to the Low Back – Use Body Weight
- Deep Pressure Massage to the Low Back – Tissue Tension Barrier
- Deep Pressure Massage to the Low Back – Deep Strokes
- Deep Pressure Massage to the Low Back – Forward Head Posture
(Click here for the blog post: Lumbodorsal (Thoracolumbar) Fascia as a Source of Low Back Pain.)