This is the 6th in a series of 13 articles on Deep Pressure Massage Technique for the Low Back
Choosing the Treatment Contact
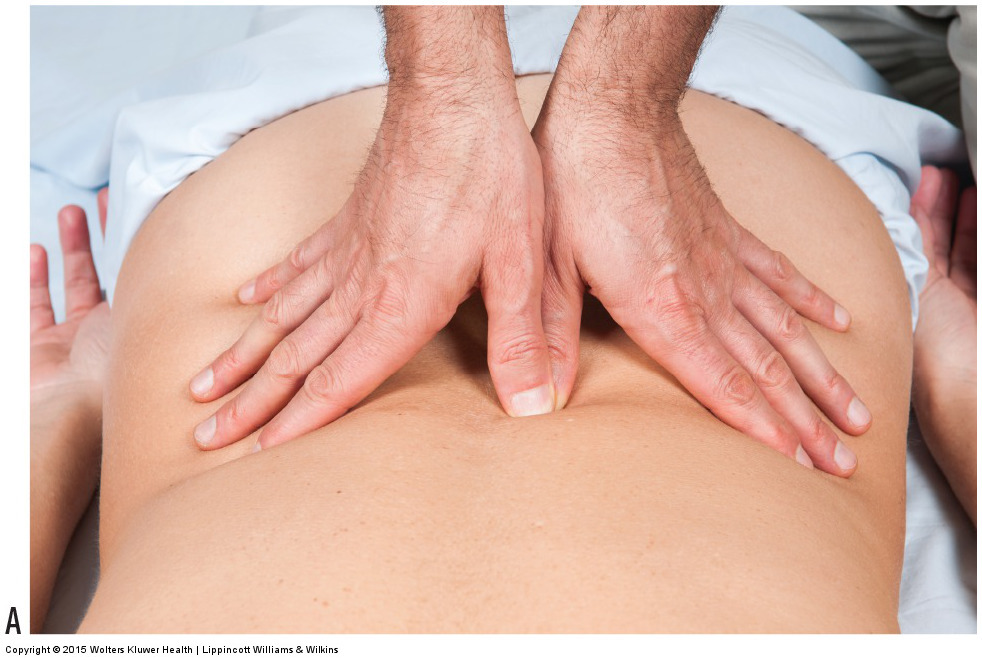
Figure 9. Treatment contacts. (A) Thumb pad. (B) Finger pads. (C) Palm. (D) “Knife-edge” (ulnar side of hand). (E) Fist. (F) Elbow. (G) Forearm. Permission Joseph E. Muscolino. Manual Therapy for the Low Back and Pelvis – A Clinical Orthopedic Approach (2013).
When working on the low back of the prone client, there are many choices for the treatment contact. Treatment contacts that can be used range from small to large: these contacts range from finger or thumb pad; to palm or ulnar side of the hand, also known as the “knife-edge” contact; to fist; and to elbow or forearm (Fig. 9). The advantage of smaller treatment contacts is that they allow for more precision both when assessing the client’s soft tissues and when working the tissues. The disadvantage is that smaller contacts are less able to deliver deep pressure and are more prone to injury when deeper pressure is being employed. Larger treatment contacts are less precise for assessment and treatment but can better deliver deeper pressure without injury.
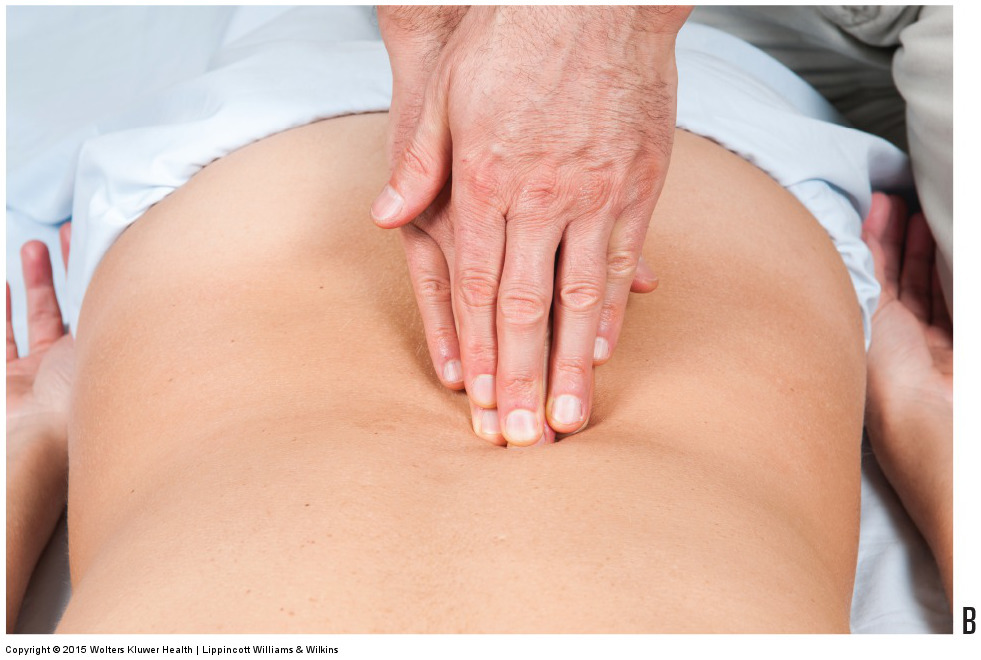
Figure 9B. Finger pads. Permission Joseph E. Muscolino. Manual Therapy for the Low Back and Pelvis – A Clinical Orthopedic Approach (2013).
Figure 9C. Palm. Permission Joseph E. Muscolino. Manual Therapy for the Low Back and Pelvis – A Clinical Orthopedic Approach (2013).
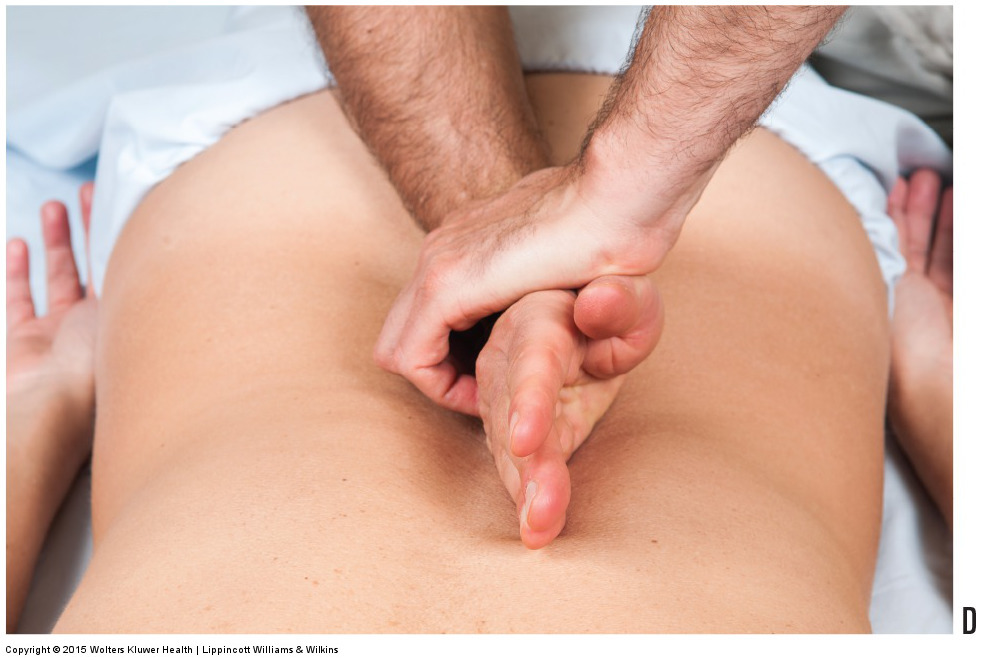
Figure 9D. Knife edge. Permission Joseph E. Muscolino. Manual Therapy for the Low Back and Pelvis – A Clinical Orthopedic Approach (2013).

Figure 9E. Fist. Permission Joseph E. Muscolino. Manual Therapy for the Low Back and Pelvis – A Clinical Orthopedic Approach (2013).
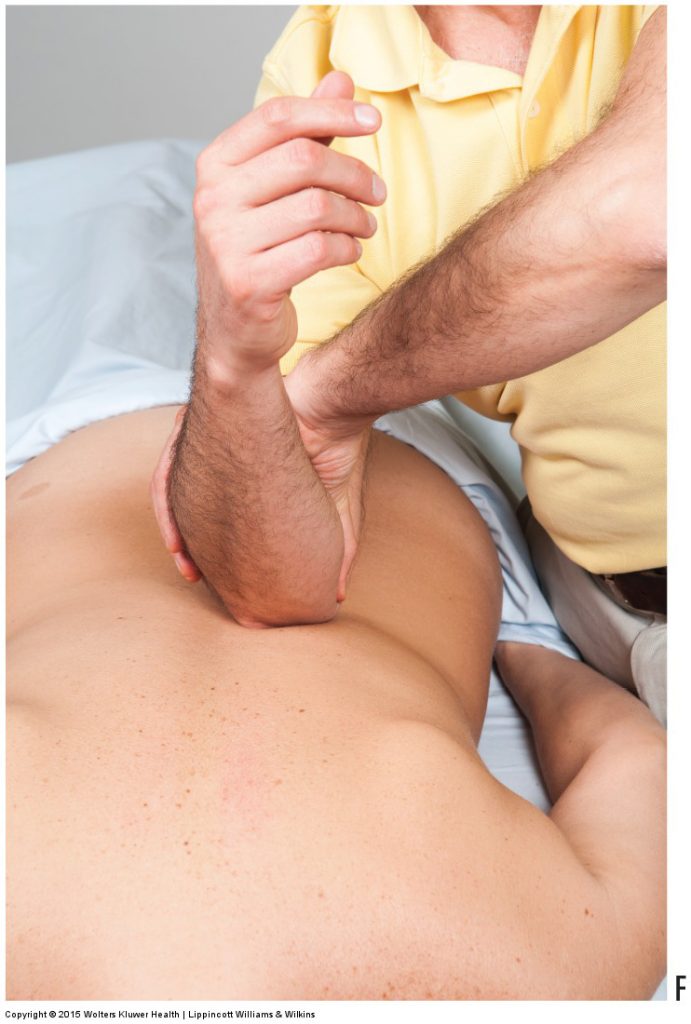
Figure 9F. Elbow. Permission Joseph E. Muscolino. Manual Therapy for the Low Back and Pelvis – A Clinical Orthopedic Approach (2013).
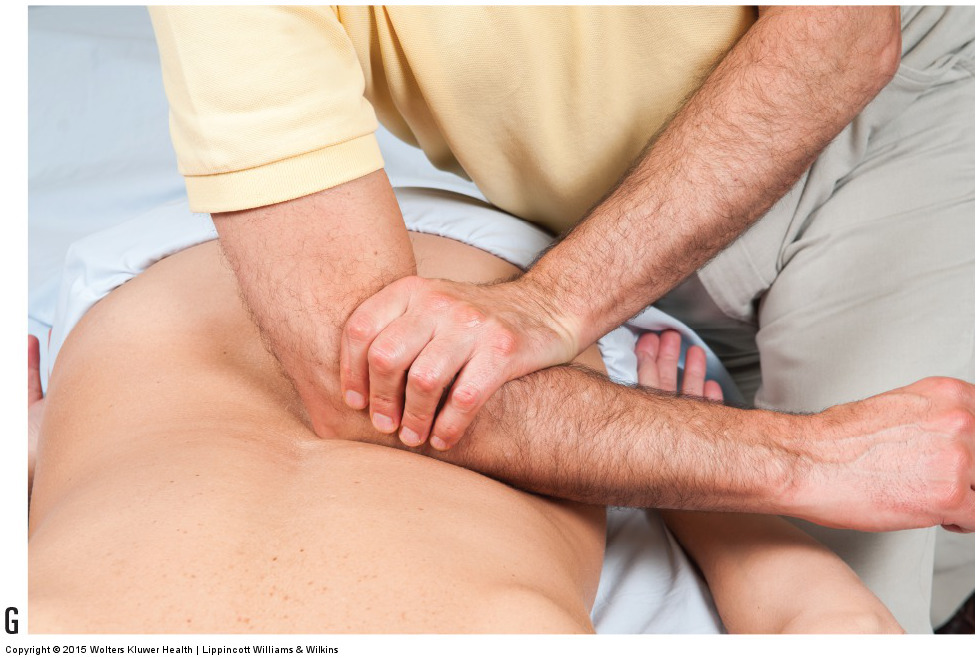
Figure 9G. Forearm. Permission Joseph E. Muscolino. Manual Therapy for the Low Back and Pelvis – A Clinical Orthopedic Approach (2013).
Treatment Contact: Thumb or Fingers
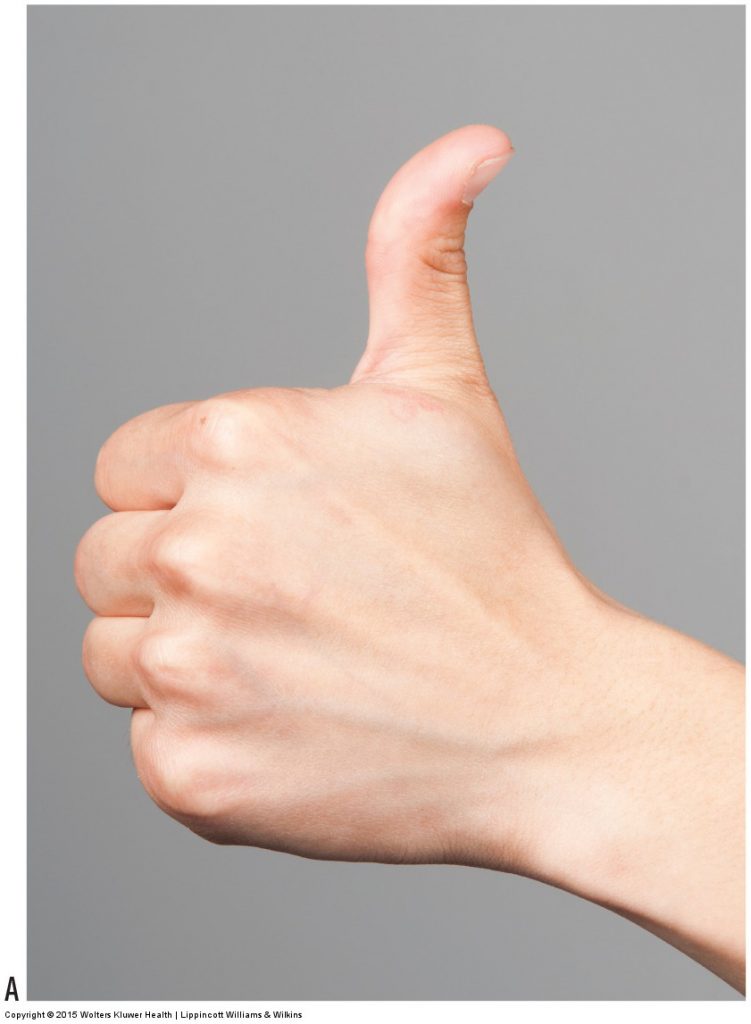
Figure 10. Interphalangeal joint of the thumb. (A) Hyperextension of the interphalangeal joint of the thumb. (B) A brace can be worn to support the thumb’s interphalangeal joint.) Permission Joseph E. Muscolino. Manual Therapy for the Low Back and Pelvis – A Clinical Orthopedic Approach (2013).
When thumbs or fingers are used as the treatment contact, it is important to contact the client with the pads and not the tips of your thumb or fingers. Applying pressure with the tips of your thumb or fingers will likely feel uncomfortable for the client, especially when you are working deep. To best access the client’s tissues with your fingers, you need to change the angulation of the shoulder, elbow, and wrist joints so that the pads naturally meet the client’s body. To best access the client’s tissues with your thumbs, you slightly extend the thumbs so the pads naturally meet the client’s body. However, it is important to not extend the thumb too far or the joints of the thumb will become unstacked and excessive torque will be placed through them. A problem that some therapists have is a hyperextendable interphalangeal joint of the thumb (Fig. 10A). If your thumb is mildly hyperextendable, you may be able to do this work with your thumb. There are also supports available that can be worn on the thumb to prevent the interphalangeal joint from collapsing into hyperextension (Fig. 10B). But if your thumb is extremely mobile into hyperextension, you may need to employ another contact when doing deep tissue work into the client.
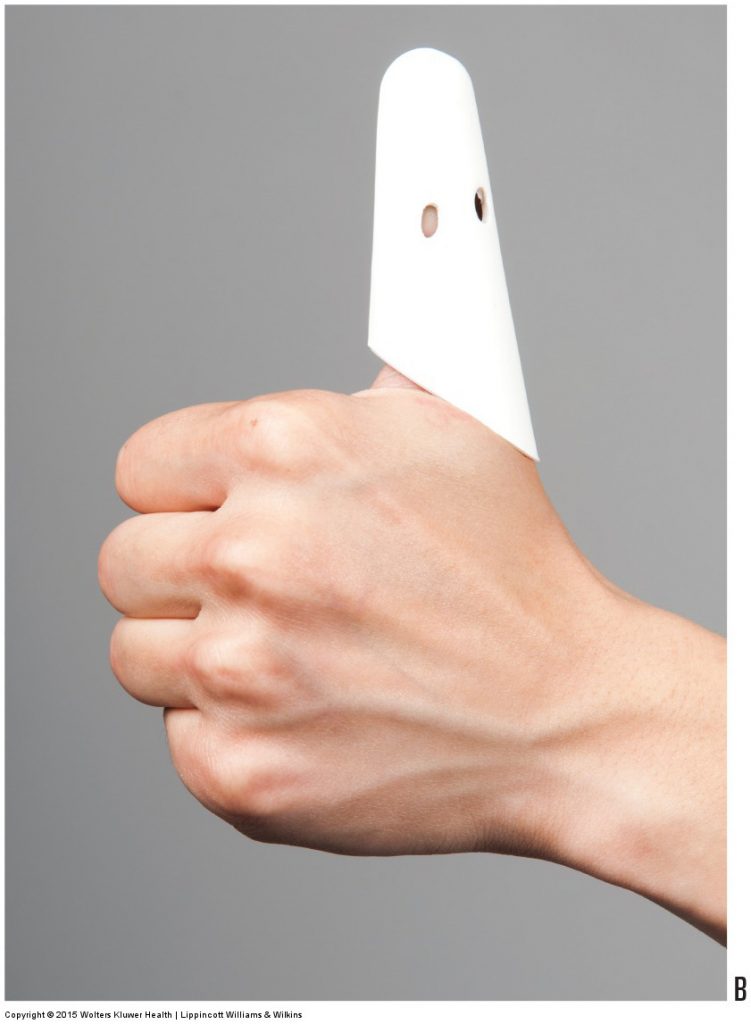
Figure 10B. Permission Joseph E. Muscolino. Manual Therapy for the Low Back and Pelvis – A Clinical Orthopedic Approach (2013).
Treatment Contact: Palm
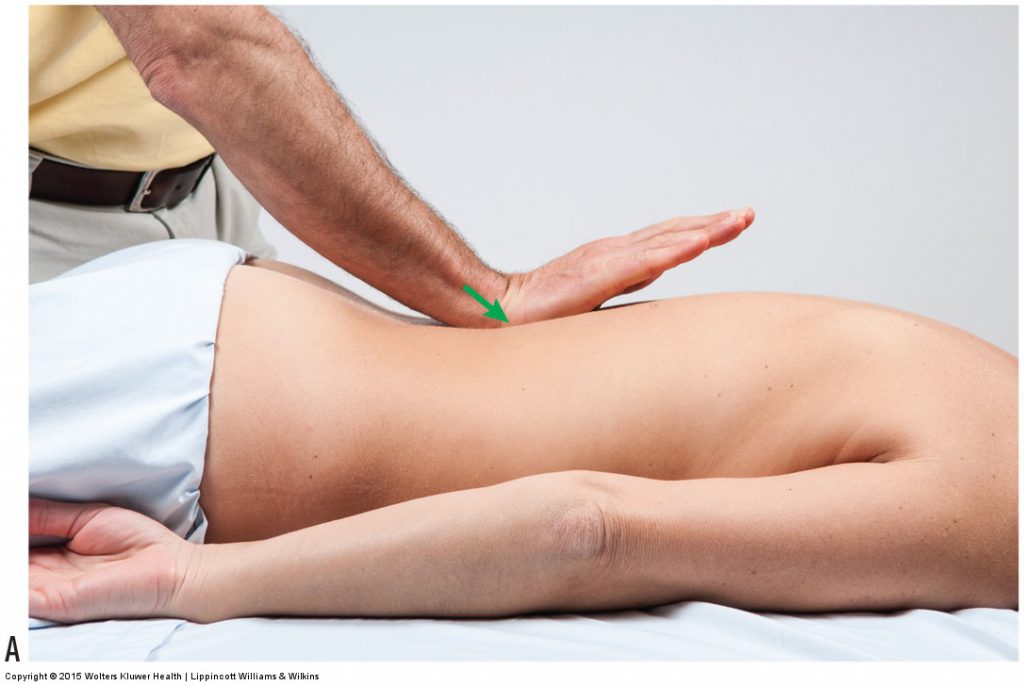
Figure 11. Palm treatment contact. (A) The palm contact is shown with the hand extended at the wrist joint to illustrate that the pressure should enter the client through the base of the palm. (B) When actually working on a client with the palm contact, the hand should be relaxed and resting on the client. (C, D) When using core body weight to press into the client with a palm contact, it is important to not let the elbow joints bend further as pressure is applied. Permission Joseph E. Muscolino. Manual Therapy for the Low Back and Pelvis – A Clinical Orthopedic Approach (2013).
When using the palm as a treatment contact, it is extremely important that the pressure that is exerted into the client is exerted through the base of the palm (heel of the hand), in other words, through the carpal region. If the palm is placed flat on the client and the pressure is exerted through the metacarpals or the fingers, it will usually result in a sagittal plane torque being placed into the wrist joint. Figure 11 illustrates this concept. In Figure 11A, the wrist joint is shown in extension to emphasize that the contact pressure into the client should be at the carpal region. Of course, when actually working on the client, so as not to fatigue the extensors musculature of the forearm, the hand should be relaxed and resting on the client as seen in Figure 11B.
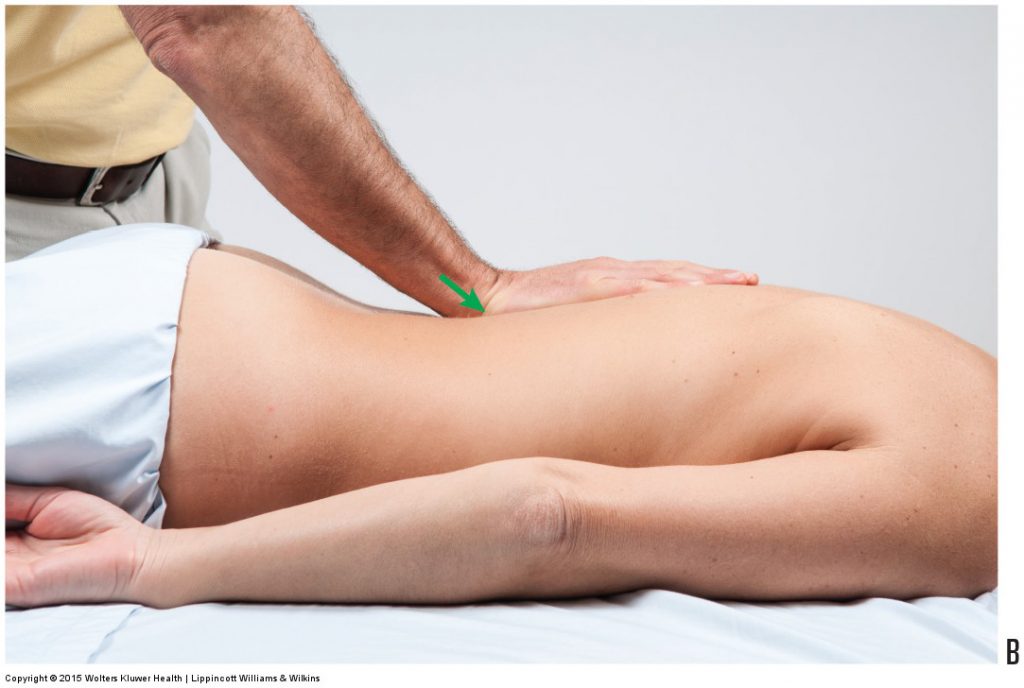
Figure 11B. Permission Joseph E. Muscolino. Manual Therapy for the Low Back and Pelvis – A Clinical Orthopedic Approach (2013).
Working on the prone client with the palm treatment contact usually requires some bend in the elbow joints so that the wrist joints are not excessively extended. When you lean in with your core to apply pressure into the client, it is extremely important that you stabilize your elbow joint and not allow it to bend any further. The purpose of using your core to lean in is to transfer body weight force through your arm, forearm, and treatment hand contact, and then into the client. If you allow your elbow joint to bend further as pressure is applied, even a small amount, you will lose some or all of that core force (Fig. 11C, D). This is a common body mechanics error that frustrates many therapists who cannot understand why they are leaning in with their core but the client is still not feeling appreciable pressure.
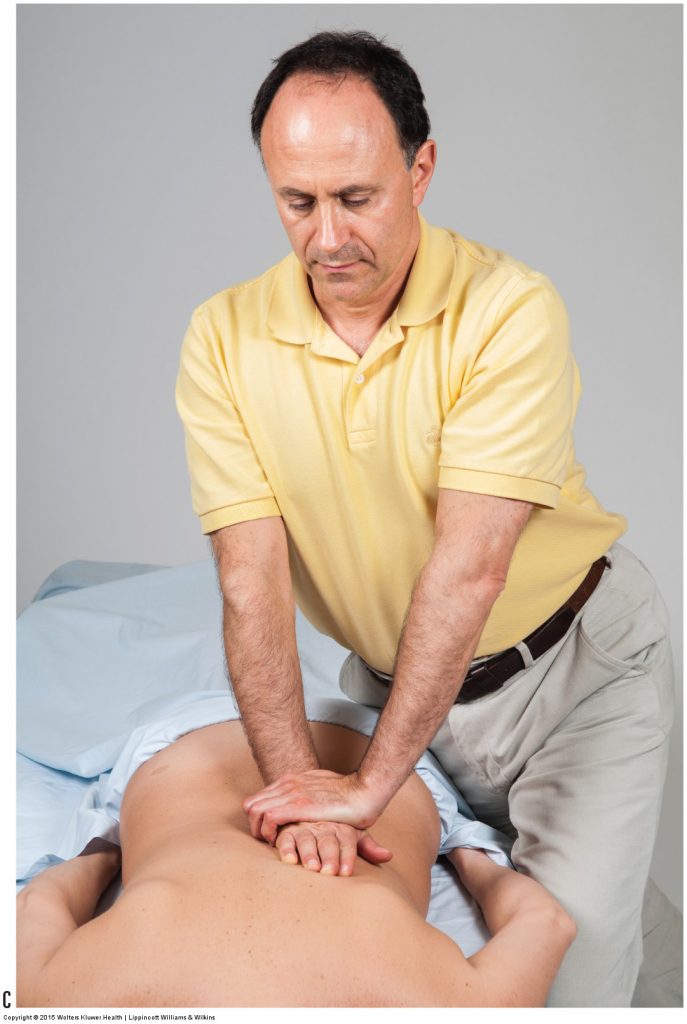
Figure 11C. Permission Joseph E. Muscolino. Manual Therapy for the Low Back and Pelvis – A Clinical Orthopedic Approach (2013).
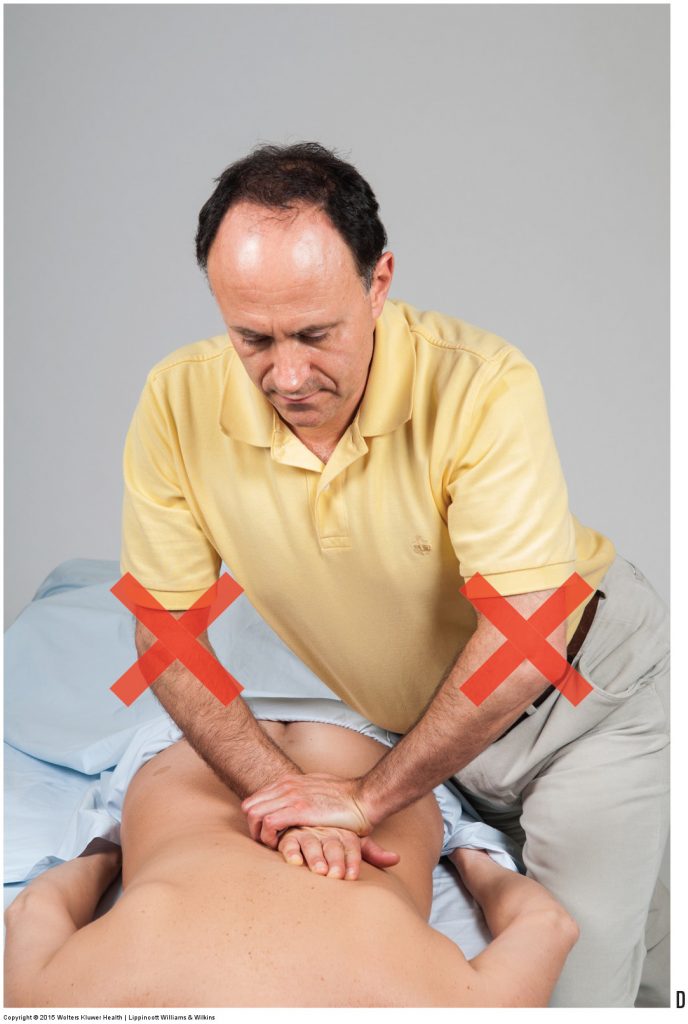
Figure 11D. Permission Joseph E. Muscolino. Manual Therapy for the Low Back and Pelvis – A Clinical Orthopedic Approach (2013).
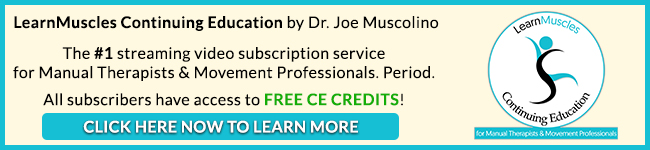
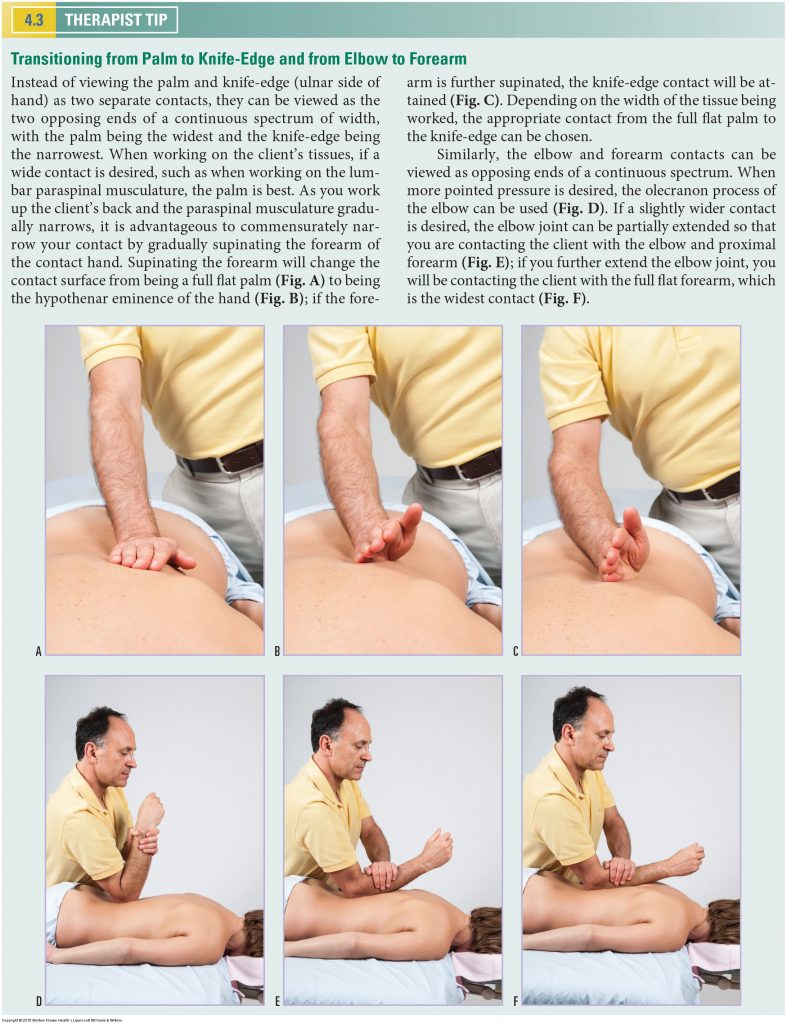
Treatment Contact: Transitioning from Palm to Knife-Edge and from Elbow to Forearm
Instead of viewing the palm and knife-edge (ulnar side of hand) as two separate treatment contacts, they can be viewed as the two opposing ends of a continuous spectrum of width, with the palm being the widest and the knife-edge being the narrowest. When working on the client’s tissues, if a wide contact is desired, such as when working on the lumbar paraspinal musculature, the palm is best. As you work up the client’s back and the paraspinal musculature gradually narrows, it is advantageous to commensurately narrow your treatment contact by gradually supinating the forearm of the contact hand. Supinating the forearm will change the contact surface from being a full flat palm (Fig. A) to being the hypothenar eminence of the hand (Fig. B); if the forearm is further supinated, the knife-edge contact will be attained (Fig. C). Depending on the width of the tissue being worked, the appropriate treatment contact from the full flat palm to the knife-edge can be chosen.
Permission Joseph E. Muscolino. Manual Therapy for the Low Back and Pelvis – A Clinical Orthopedic Approach (2013).
Treatment Contact: Elbow and Forearm
Similarly, the elbow and forearm treatment contacts can be viewed as opposing ends of a continuous spectrum. When more pointed pressure is desired, the olecranon process of the elbow can be used (Fig. D). If a slightly wider contact is desired, the elbow joint can be partially extended so that you are contacting the client with the elbow and proximal forearm (Fig. E); if you further extend the elbow joint, you will be contacting the client with the full flat forearm, which is the widest contact (Fig. F).
Alternating the Treatment Contact
Even perfect body mechanics cannot eliminate all physical stress to your body when doing massage. Ideal body mechanics merely minimize the stress. For this reason, when doing massage, it is wise to alternate which treatment contact you use during a session. Given the mass of musculature in the low back and pelvis, it is wise to use larger treatment contacts as much as possible. A good strategy is to begin with smaller contacts such as thumb or finger pads to assess and begin treatment of the lumbar region or pelvis and then switch to a larger contact such as the palm or elbow to deliver deeper pressure.
This is the 6th of 13 articles on Deep Pressure Massage for the Low Back.
The thirteen articles are:
- Introduction to Deep Pressure Massage to the Low Back
- Deep Pressure Massage to the Low Back – Choosing the Right Table
- Deep Pressure Massage to the Low Back – Overview
- Deep Pressure Massage to the Low Back – Client and Therapist Positioning
- Deep Pressure Massage to the Low Back – Positioning the Feet
- Deep Pressure Massage to the Low Back – Choosing the Treatment Contact
- Deep Pressure Massage to the Low Back – Support Your Treatment Contact
- Deep Pressure Massage to the Low Back – Use Stacked Joints
- Deep Pressure Massage to the Low Back – Apply Pressure Perpendicularly
- Deep Pressure Massage to the Low Back – Use Body Weight
- Deep Pressure Massage to the Low Back – Tissue Tension Barrier
- Deep Pressure Massage to the Low Back – Deep Strokes
- Deep Pressure Massage to the Low Back – Forward Head Posture
(Click here for the blog post article: Neck Deep Pressure Massage: Step by Step – Contacts.)